Using Postman to Interact with gRPC and Braiins OS Public API
Introduction
Postman is a popular tool for API testing that supports various types of APIs, including REST, SOAP, and GraphQL. Recently, Postman introduced support for gRPC, enabling developers to test gRPC APIs directly from the Postman interface. This guide will walk you through the process of using Postman to interact with gRPC services.
Installation and Setups
You can download the app to get started using the Postman. Or, if you prefer a browser experience, you can try the web version of Postman.
Download and Install Postman Desktop App
Download the latest version of Postman that supports gRPC from the official website.
Install Postman on your system following the installation instructions provided on the website based on your operating system.
Getting Started
To get started with Postman, you need to set up your environment and make authenticated API calls to interact with the Braiins OS Public API.
The Braiins OS Public API provides a gRPC interface for interacting with Braiins OS miners. The port for the BOS Public API is 50051*.
Exploring Services
To explore services on a gRPC server, there are two primary approaches:
- Setting up by using Server Reflection: This method allows you to dynamically discover available services on the server, offering a straightforward way to understand its capabilities without external dependencies.
- Setting up by importing Proto Files: For more details, gRPC services can be defined and interacted with through Protocol Buffers (proto files). Importing these proto-file definitions is essential for accessing the service specifications.
In the end, you choose which approach fits better for your use cases, but we will continue to use Refection Support to interact with the Braiins OS Public API for the rest of the guide.
Setting up Postman for the First Time
1. Setting Up Environments: Globals (Port) and Base URL (Miner IP)
Environments in Postman allow you to switch between different sets of data, such as Port, base URLs (Miners) and authentication tokens, which can vary between development, testing, and production environments. You can set up a Global environment for common variables and a Miner-specific environment for testing different miner configurations.
Global Environment
- Open the "Environments" tab on the left sidebar.
- Click on Globals to edit the global environment.
- Add a Variable with the name
PORTand Initial Value and Current Value50051*. - Save the environment by clicking the top right "Save" button.
Miner Environment
- On the "Environments" tab, Click on
+icon to create a new environment. - Name it
My Miner, and add a variable with the nameMINER_IPand Initial Value and Current Value with your actual miner's IP address and ClickSavebutton (In our example it's10.34.1.18).
2. Setting Up Collections
Collections in Postman allow you to organize your API requests. For gRPC testing, you can create collections for different purposes, such as managing endpoints, handling reflection, and importing proto files.
Setting up by using Server Reflection:
- On Top horizontal tabs, Click on
+icon to create the first request via reflection. - Click on the request type icon and switch it to
gRPC. - Click on the "Enter URL" field and select
grpc://{{MINER_IP}}:{{PORT}}from the dropdown. - CLick on the top right dropdown "No Environment" and select
My Minerenvironment. - Click on the "Select a method" field and Click on
Use Server Reflection, to fetch the available services and methods. - Choose the
GetApiVersionfromApiVersionServiceand Click on the blueInvokebutton. - Click on the
Savebutton to save the request and Give it your desired name likeGet API Versionand Also a name for the collection likeReflection.
Making Authenticated API Calls
Setting up Token Handling (Obtaining a Session Token):
- Repeat the steps 1-6 from the Setting up by using Server Reflection to create a new request.
- Choose the
LoginfromAuthenticationService - Paste the JSON below as compose message in the
Messagetab: - Copy and Paste the script below into the
Scripts>After Responsetab: - Click on the
Savebutton to save the request and Give it your desired name likeLoginunder the collection folder. - Click on the blue
Invokebutton to send the request and get the token. (Status code:0 OK, with a response metadataauthorization)
Setting up Token Handling (Obtaining a Session Token):
- Repeat the steps 1-6 from the Setting up by using Server Reflection to create a new request.
- Choose any Endpoint you want to send a request. (e.g.:
GetMinerDetailsfromMinerService) - Navigate to Metadata tab and add a new key-value pair with
authorizationas key and{{AUTH_TOKEN}}as value. - Click on the
Savebutton to save the request and Give it your desired name likeGetMinerDetailsunder the collection folder. - Click on the blue
Invokebutton to send the request and get the miner details. (Status code:0 OK, with a JSON response body.)
Examples
Get Request
Get Tuner State
- Right-click on the previously created request "GetMinerDetails" and Click on
Duplicatemenu to create a new request. - Right-click on the duplicated request and Click on
Renameto modify the name. - It the right side, Choose
GetTunerStatefromPerformanceSerivceEndpoint. - Click on the
Savebutton to save the request. - Click on the blue
Invokebutton to send the request and get the miner details. (Status code:0 OK, with a JSON response body.)
Set Request
Set Power Target
- Right-click on the previously created request "GetMinerDetails" and Click on
Duplicatemenu to create a new request. - Right-click on the duplicated request and Click on
Renameto modify the name. - It the right side, Choose
SetPowerTargetfromPerformanceSerivceEndpoint. - Click on the
Savebutton to save the request. - Click on
Use Example Messageto load the default message. - Modify the
power_targetvalue to your desired value. (e.g.: 1750) - Click on the blue
Invokebutton to send the request and get the miner details. (Status code:0 OK, with a JSON response body.)
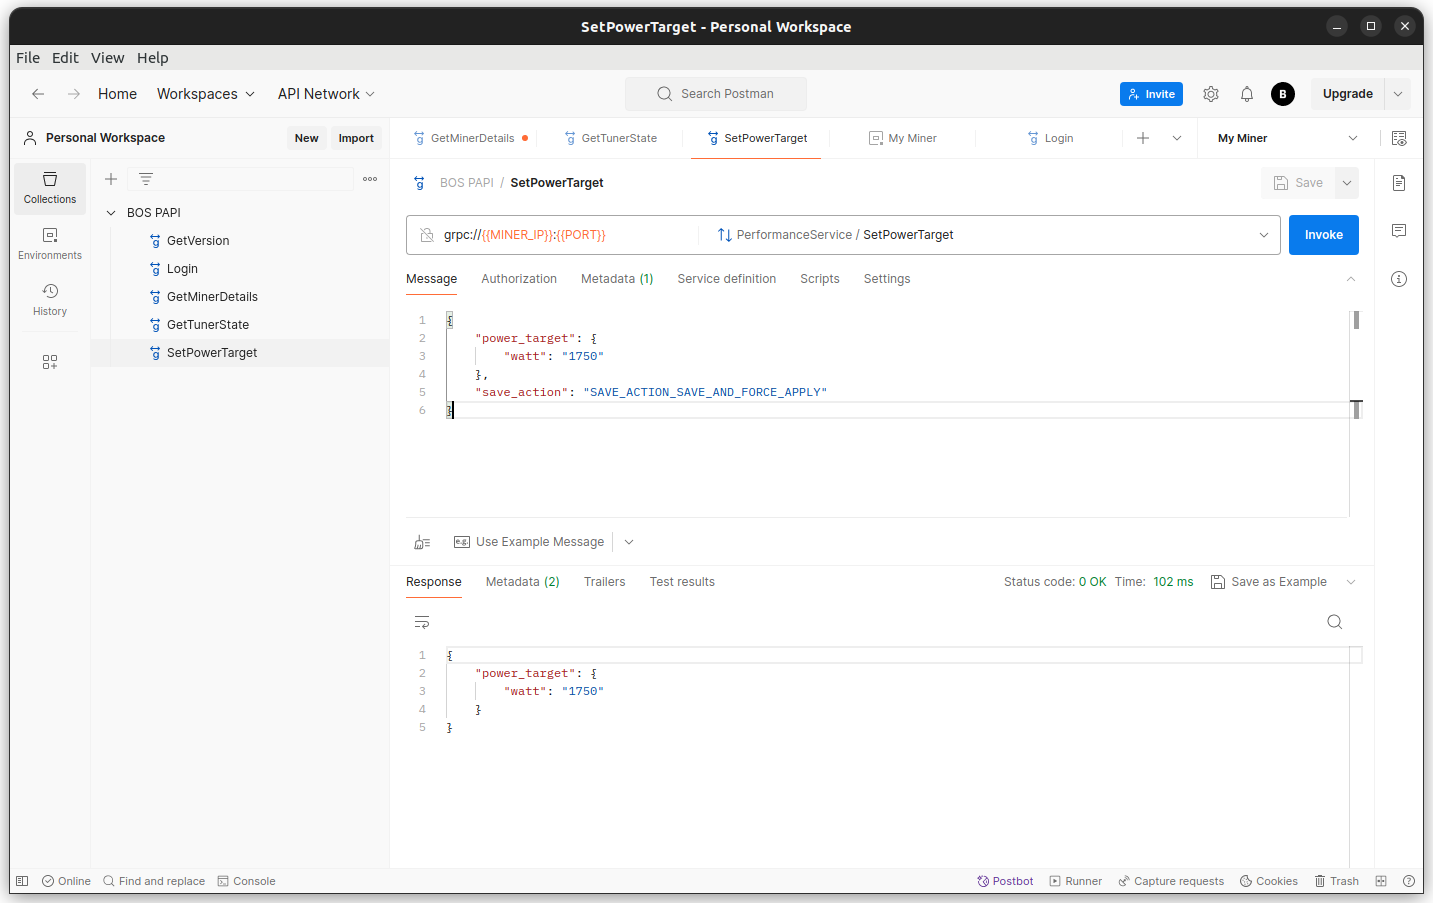
Save Action Field Explanation
The SaveAction field specifies how changes made via API calls should be handled regarding the miner's configuration:
SAVE_ACTION_UNSPECIFIED: Default behavior without explicit save action.SAVE_ACTION_SAVE: Saves changes without applying them immediately.SAVE_ACTION_SAVE_AND_APPLY: Saves and applies changes right away.SAVE_ACTION_SAVE_AND_FORCE_APPLY: Forces immediate application of changes, bypassing any normal checks.
Stream Request
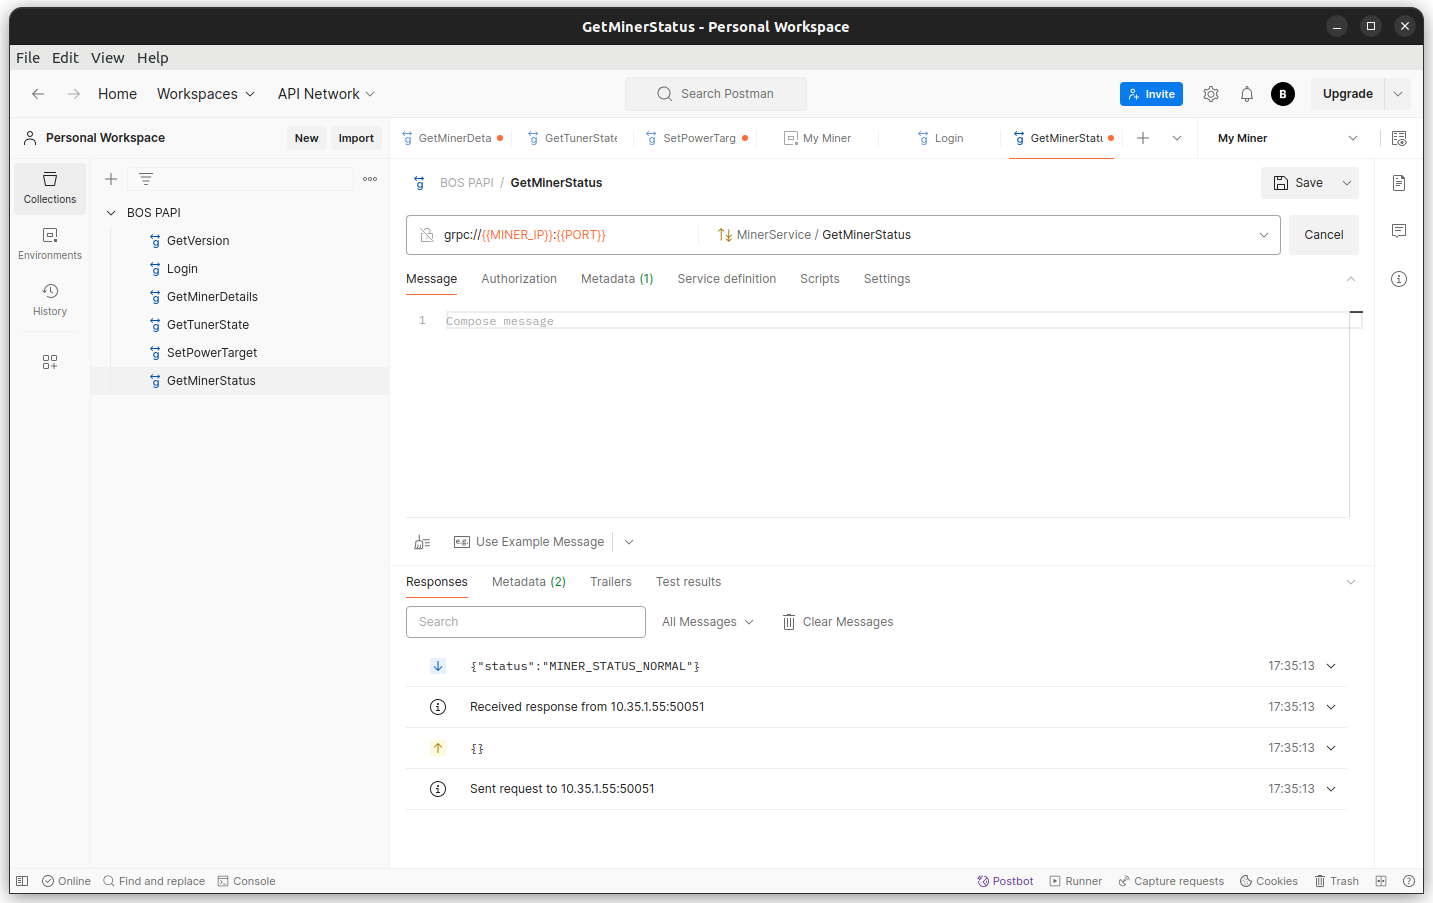
Get Miner Status
- Right-click on the previously created request "GetMinerDetails" and Click on
Duplicatemenu to create a new request. - Right-click on the duplicated request and Click on
Renameto modify the name. - It the right side, Choose
GetMinerStatusfromMinerServiceEndpoint. - Click on the
Savebutton to save the request. - Click on the blue
Invokebutton to send the request to stream the miner status, It will keep streaming the miner status until you Cancel it.
Footnotes
Port 50051
BOS Public API uses port number 50051 and it's open on Braiins OS, Only if you are using Braiins OS 23.03 you need to open API port manually ssh root@MINER_IP 'iptables -A INPUT -p tcp --dport 50051 -j ACCEPT'.