System Settings & Network Configuration
These sections present global system settings for the device and are divided into several sub-categories.
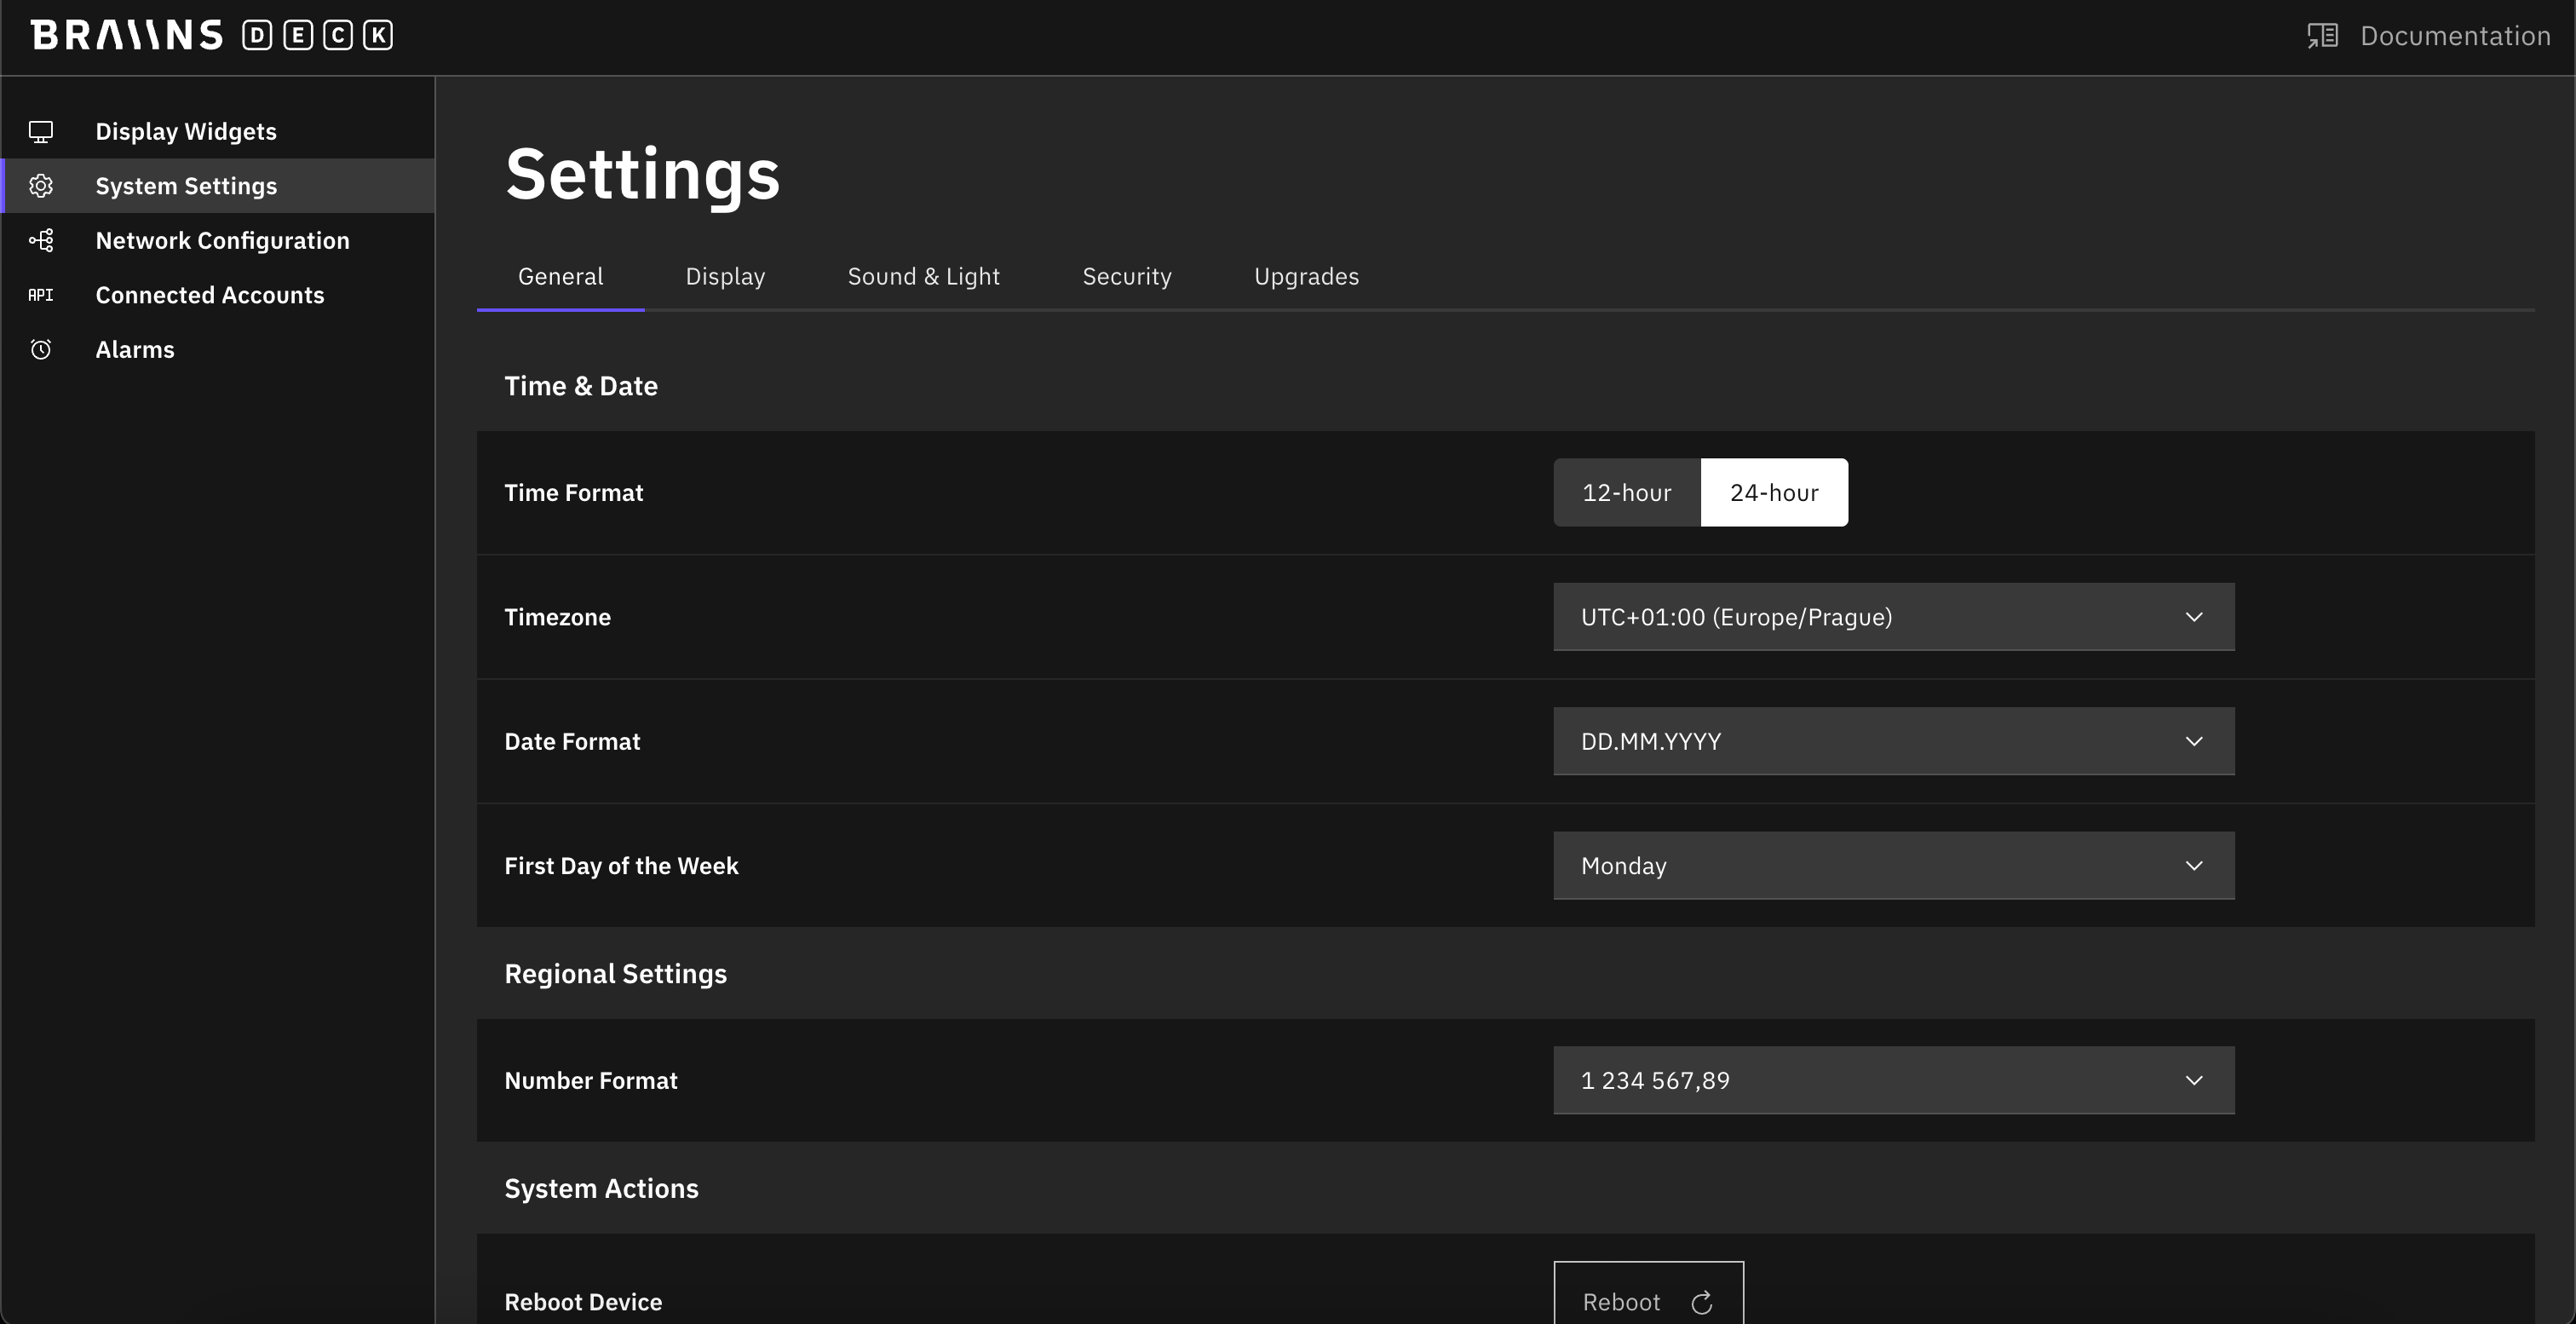
General
- Time Format: choose between 12 or 24 hours format, it will affect the clock but bear in mind that all the alarms have to be set in 24h format.
- Timezone: you can configure the right timezone for you by searching for a city or an appropriate UTC timezone.
- Date Format: global setting for all the display scenes.
- First Day of the Week: global setting for all the display scenes.
- Number Format: global setting for all the display scenes.
- Reboot: will reboot the device.
- Download Support Archive: this action will download logs, that our support team needs to help you troubleshoot any issues with the device.
- Reset to factory defaults: performs a soft reset - wipes all settings and data but keeps the currently installed firmware.
Reset Button
The physical reset button is located on the back of the device. It can be used in two scenarios:
- From a running device: A quick press (less than 2 seconds) will reboot the device. Holding for 5 seconds or more triggers a soft reset (same as the web UI - wipes user data but keeps the current firmware).
- During power-up (factory reset): Hold the button while plugging in the power cable. After 5 seconds, a red LED will indicate that factory reset mode is ready. Release the button to perform the factory reset. This restores the device to its original factory state, including the initially flashed firmware.
Display
- Screen Brightness: default brightness level of the device.
- Night mode: you can select a time interval when the display will use different levels of brightness, also during this time only the first display scene in the list will be displayed on the device
- screen cycling will be off.
Sound & Light
- Select default sound volume and sound volume during the night mode.
- Enable or Disable LED signals (notifications and alerts will be available in future releases).
Security
- Set up a password for your DECK for better security.
- This password will also be your SSH password.
Upgrades
Upgrades are downloaded automatically right now and you can always check which version you are on in this section.
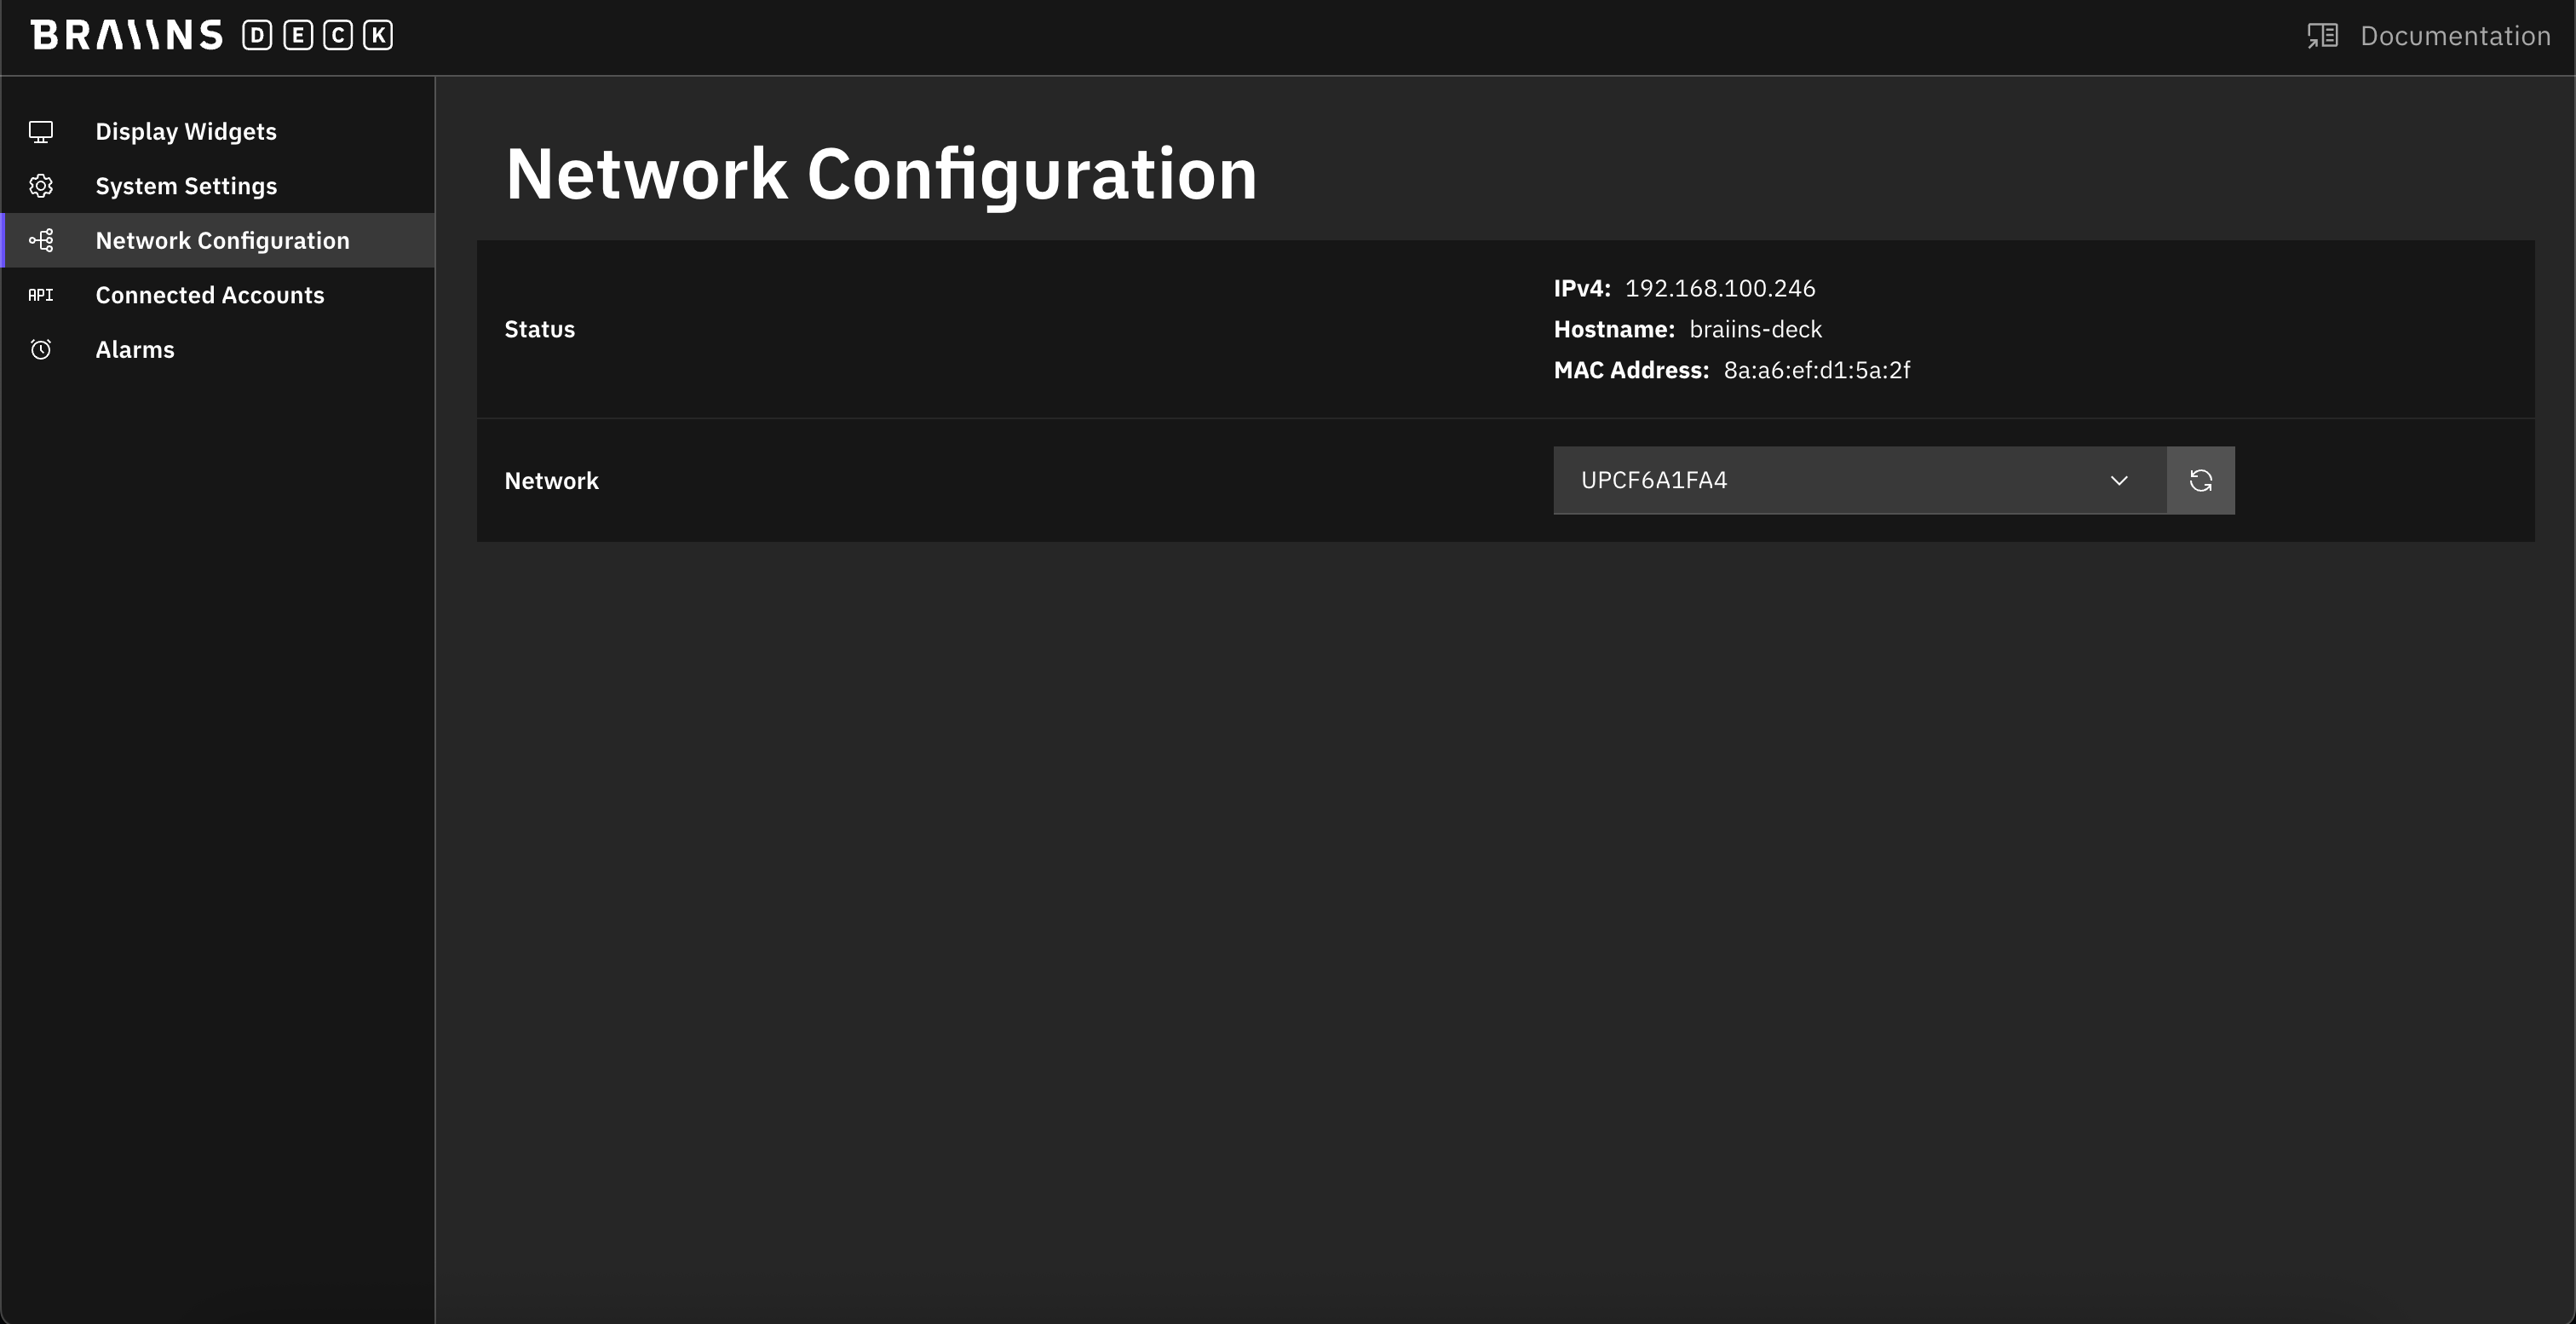
Network Configuration
- Check your DECK's IP address, hostname and MAC address in this section.
- To select a new WiFi trigger the network scan, the device will be offline while the scan is in progress and you won't be able to change any settings.
WiFi Reconfiguration via Display
You can reconfigure your WiFi network directly from the device's display without performing a factory reset. There are two ways to enter WiFi reconfiguration mode:
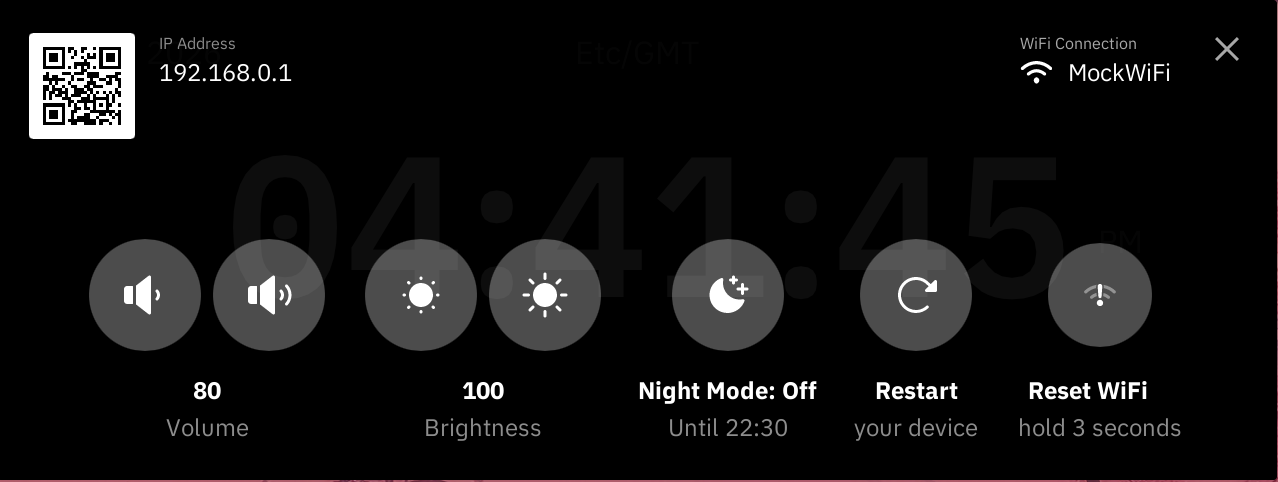
Reset WiFi Button
- Located in the bottom controls of the display.
- Hold the "Reset WiFi" button for 3 seconds (a progress ring will show the hold progress).

Reconfigure WiFi Button
- If WiFi connection fails, a "Reconfigure WiFi" button appears on the failure screen.
- This screen appears when the Deck fails to connect to a network. This is usually triggered shortly after boot if the Deck cannot detect the previously configured network, or when it unsuccessfully tries to reconnect to an existing network.
- Tap the button to enter reconfiguration mode.

What Happens in Reconfiguration Mode
- The device broadcasts an Access Point and opens a captive portal where you can configure a new WiFi network.
- The reconfiguration mode has an 8-minute timeout, but the AP remains active in the background so you can still connect.
Was this helpful?