This is the section where you can Add or Edit all of the widgets that are displayed on the device screen. The DECK comes with several pre-configured widgets for your convenience. You can leave them as is, edit, disable or delete them completely.
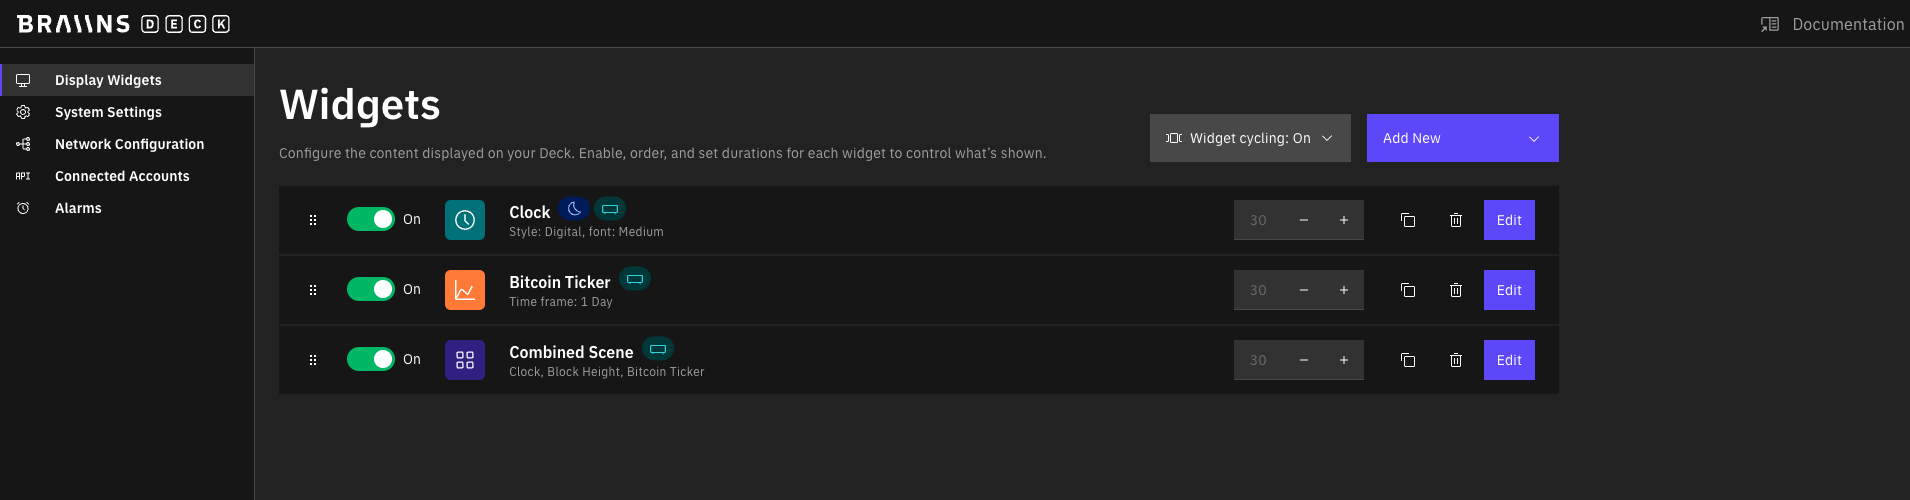
Widget List and Cycling Settings
Here you can disable widgets from being displayed on the screen, change order in which they will be rotated, clone, edit and delete them from the list.
Braiins DECK rotates widgets on its screen that are added to the list in a given interval. You can turn the cycling off and on and also change the default duration of the cycling interval.
It is possible to setup a custom screen cycling duration as well by rewriting the default values for each widget. When this is done, global value for time interval will not take effect anymore. To go back to the default value, simply delete the custom number you have set.
Adding Full-screen Widgets
You can add new widgets to the list by clicking in the Add New button. Every widget has a full screen version and also smaller version, that can be a part of the Combined scene.
Some widgets are local and some are remote. The difference is in the way the displayed image is created and will not affect how widgets are displayed in any significant way. Local widgets are previewed on the screen of the Deck as you add and customize them, for remote ones you need to save the settings to see the preview.
Local widgets are processed directly on the device and images for remote widgets are created in the cloud. You can chose any widget from both lists and mix them into a Combined scene in any way you please.
Most of the widgets do not require any additional steps to be added to the Deck besides some basic configuration that is requested during the setup and so the whole process is very intuitive.
Some widgets, like the one for Braiins Pool monitoring, need a Connected account, to pull the relevant data. See the Connected accounts section to learn how to do that.
Another widget that asks for additional steps is Image. Here are the simple steps that explain everything is detail.
Image Widget
The custom image has to fulfill the following requirements to be displayed on the Deck:
- Wi-Fi connection is working
- HTTP(s) server (specified by URL) is working (e.g. endpoint is accessible, no HTTP errors)
- Image has PNG or JPEG format
- Image has exact resolution for chosen widget size:
- small: 317x238px
- medium: 638x238px
- large: 638x480px
- fullscreen: 1280x480px
You can use any of the many free online tools available to change the image format and corp it to the right size. After that, upload the image to an online storage and paste the link to that image into the widget settings on the Deck.
We suggest you to choose the highest value of refresh duration which makes sense for your usecase. If your image is static, it’s not necessary to refresh it every 10 seconds. This way you can avoid unnecessary server load and network traffic.
Adding a Combined scene
You can display several remote and local widgets at the same time in a Combined scene to create customs dashboards that fit your needs the best. Each widget has the same settings and behavior as in the full-screen mode and the data displayed are adjusted to fit the smaller size.