Getting Started with Braiins Deck
Hardware Setup
1. Unbox and plug in the DECK
- Carefully take the DECK out of the box.
- Plug the power supply adapter into a power socket and connect the USB-C power cord to the input socket on the back of the DECK.
2. Check the Power Supply Adapter compatibility
Dual color LED on the back side of the DECK tells you if your power chain is compatible or not.
- Continuous RED light: incompatible power adapter or cable (possibly USB-A to USB-C cable).
- Continuous GREEN light: compatible power adapter and cable.
Green will turn off after 2 seconds to bring you the best user experience.
3. Wait for the boot
Once everything is plugged in, you should see a purple light under the deck and the device will boot in just several seconds.
After the boot, you should see the Initial Setup screen along with a loading animation of the LEDs.
Connecting Braiins DECK to WiFi
1. Connect to Braiins DECK WiFi
Grab your phone or laptop and open your Wi-Fi settings. Look for a network called Braiins Deck.
Tap on the DECK network, and you’ll be redirected to the setup wizard.
If the automatic redirect doesn’t work, the DECK screen displays a QR code you can scan to access the setup wizard. Alternatively, open http://10.0.0.21/ in your browser.
2. Go through the setup wizard
Start by selecting your WiFi network, type in your password and wait for the device to connect.
You will see a confirmation screen and green LED light once it is connected.
3. Access DECK graphical interface
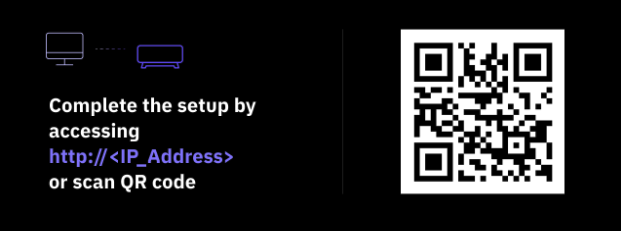
Once the DECK is connected to your WiFi, you can now access the interface on an IP address shown on the screen of the device.
Type the address into your browser or scan the QR code shown on the screen of the device and open the link.
4. Finish the initial setup
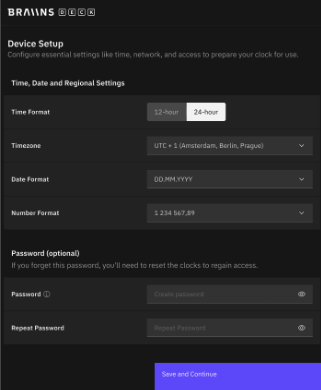
Finish the last step of the setup by configuring a few basics, you can also set up a password, and your DECK will be ready!
If You See a Wi-Fi Setup Issue
If the DECK shows an issue screen during Wi‑Fi setup, it means the device can’t communicate with the Wi‑Fi module. In this case, the setup will time out after about 2 and a half minutes, and the DECK will automatically reboot.