Members and Invitations
Share access by inviting people to an account. Each member signs in with their own Braiins ID and keeps their password, 2FA methods, and recovery keys private.
See Alice and Bob's invitation diagram for the steps from a pending invitation to membership. The screenshots follow Alice (alice@example.com) inviting Bob (bob@example.com) to Acme Mining.
Account Roles and Access
Each member has an account role and separate product access, such as Hashpower access.
The account role controls what they can manage in Braiins ID:
The access level controls what they can do in the product. In Braiins Hashpower:
The two are independent. A Member with Admin access can place bids and change product settings, but still cannot rename the account, invite anyone, or change what other people can do. Only an Owner can do those.
Invite a Member
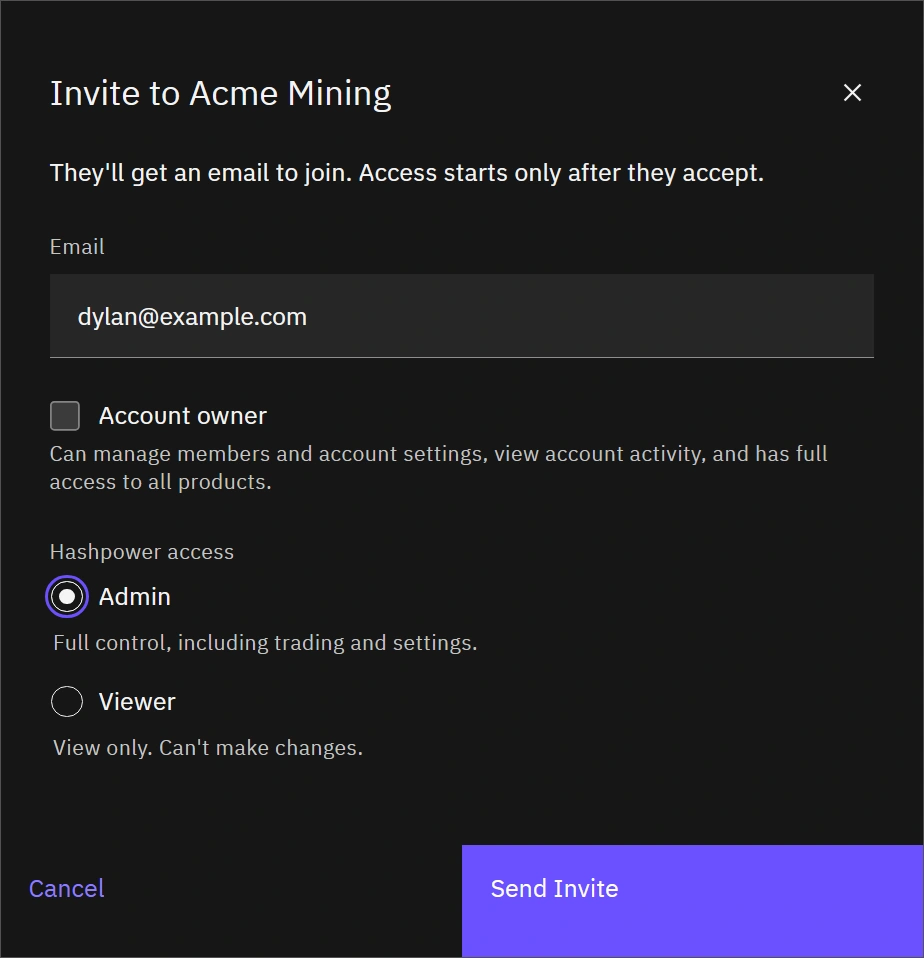
You need to be an account owner.
- Open Accounts and select the account name or row.
- In Members, select Invite Member.
- Enter the recipient's email address. Ask them which address they use, or will use, for their Braiins ID.
- Leave Account owner unchecked to invite a Member. Check it only if the person should manage members and account settings, view account activity, and have full access to every product.
- Under Hashpower access, choose Admin for full control including trading and settings, or Viewer for view only. Checking Account owner replaces this choice, because owners always have full access to every product.
- Select Send Invite.
- Check Pending Invitations for the recipient, their access, and the expiry date.
The dialog says it plainly: they get an email to join, and access starts only after they accept. Until then they appear under Pending Invitations, not Members.
An invitation always grants some access. To add someone without any, invite them and then edit their access.
Accept an Invitation
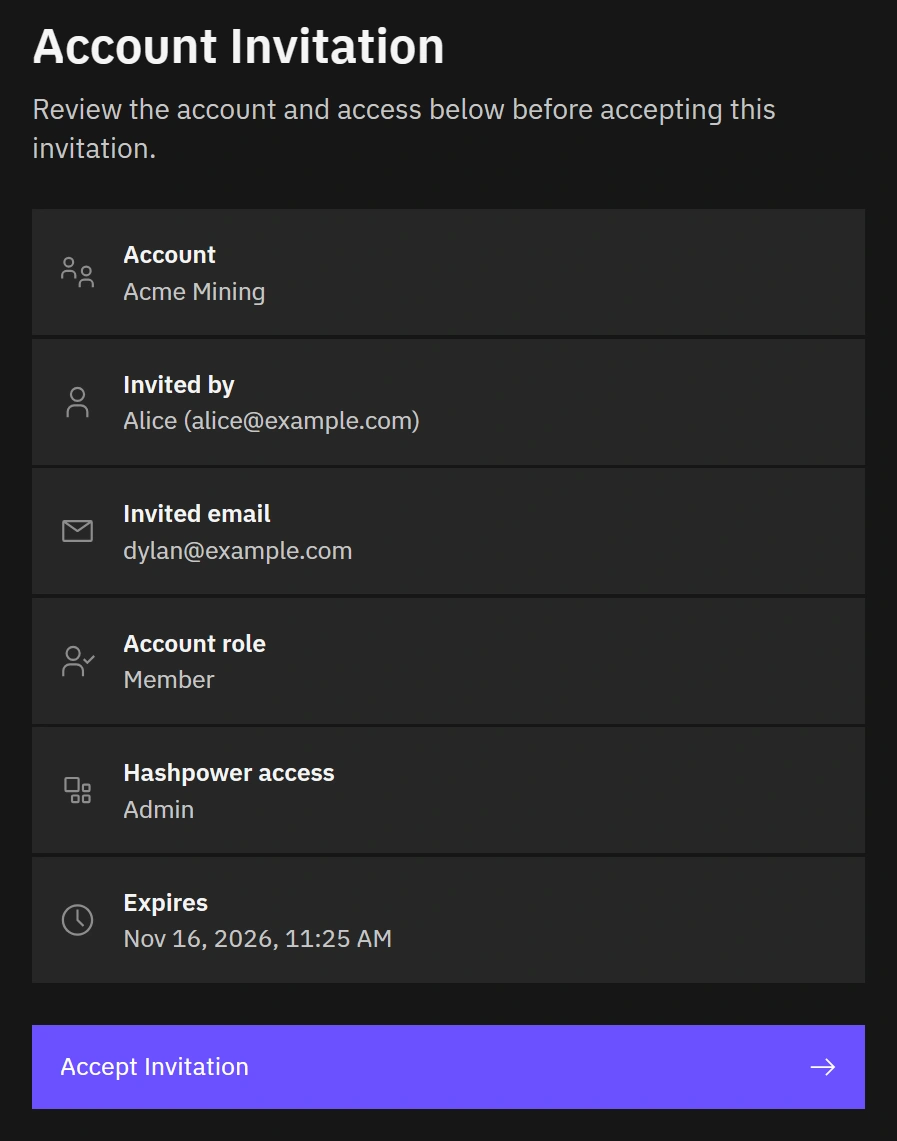
- Open the invitation email and follow its invitation link.
- Sign in with the Braiins ID for the invited email address. If necessary, create that Braiins ID and complete email verification and security setup first, then reopen the link.
- Review every row on Account Invitation: Account, Invited by, Invited email, Account role, your access in each product such as Hashpower access, and Expires.
- Select Accept Invitation.
- Wait for You've joined…, which repeats your account role and access for each product, then select Go to Accounts.
- Open the account and check that you are listed under Members.
Account role and product access are separate rows because they mean different things. Account role: Member says you belong to the account; Hashpower access: Admin says what you can do inside Hashpower. The product is named even when the invitation form offered no product choice.
If access is still being prepared after acceptance, use the offered retry to finish joining; do not assume a pending invitation has already granted access. If you are signed in with a different email, use Log In With a Different Email. If the invitation is expired or revoked, ask an owner for a new one. Do not forward an invitation as a way to invite someone else.
Revoke or Replace a Pending Invitation
- Open the account's details.
- Find the recipient under Pending Invitations.
- Open that invitation's actions menu, select Revoke Invitation, and confirm.
- Check that the invitation is no longer pending.
To correct an email address, account role, or access before acceptance, revoke the invitation and send a new one. If the person has already joined, use the member controls below.
Change a Member's Access
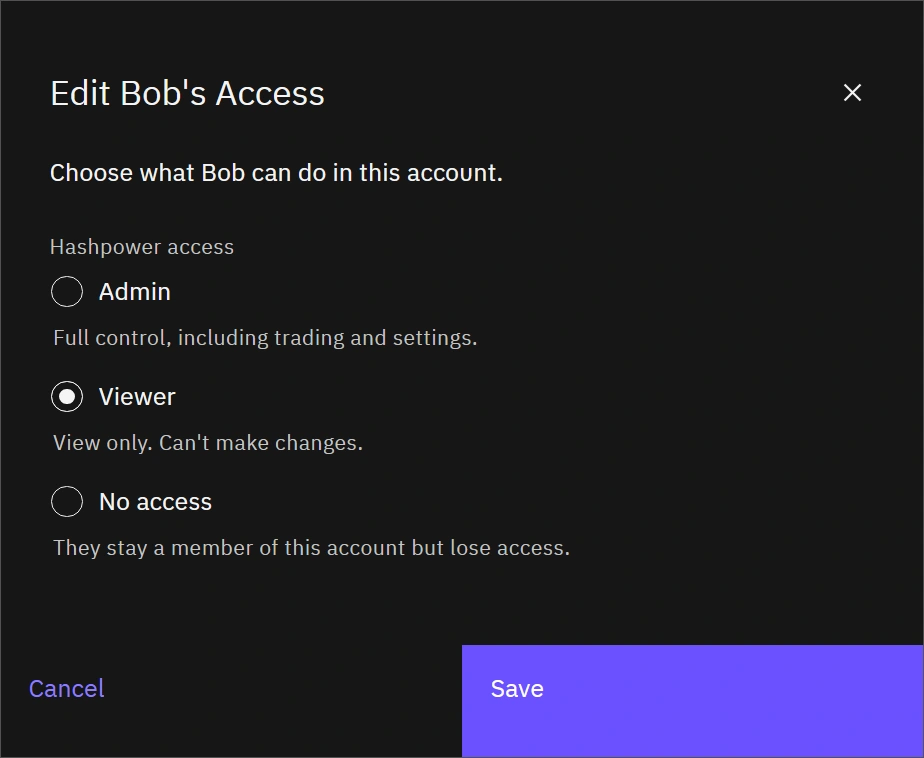
Owners can change what a member can do in the product:
- Open the account's page and find the person under Members.
- Open that member's actions menu and select Edit access.
- Choose Admin, Viewer, or No access.
- Select Save and check the Hashpower Access column.
No access keeps the person a member of the account but takes away everything they could see or do in the product — as the dialog puts it, they stay a member but lose access. Owners always have Admin access, so their row shows Admin and cannot be edited while they remain owners.
Change a Member's Account Role
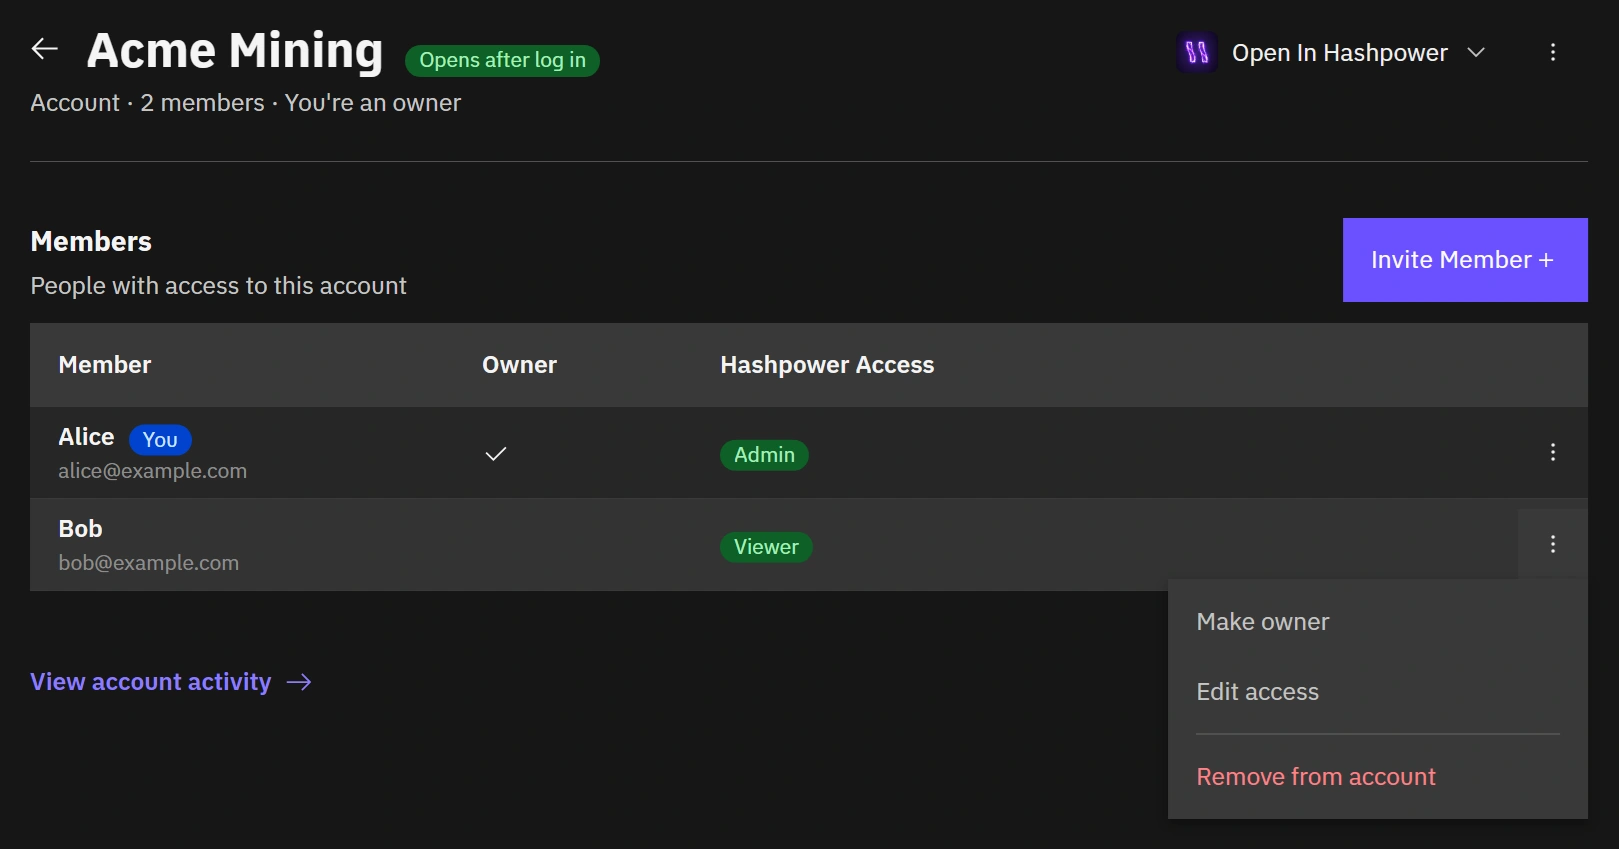
You need to be an account owner.
- Open the member's actions menu with the ⋮ button at the end of their row. It offers Make owner, Edit access, and Remove from account.
- Select Make owner for a Member, or Change to Member for another Owner. Review the confirmation. When removing ownership, choose the product access the person should keep.
- Confirm, then check the Owner tick and the Hashpower Access column for that person.
Only owners can change ownership. Making someone an owner gives them full control, including over other owners, and Admin access. An account can have several owners.
When an owner stops being an owner, whether another owner removes their ownership or they step down, the confirmation asks you to choose their access. Admin for the whole account is preselected. To hand over an account, use Account actions → Transfer ownership: choose the new owner, then whether you stay an owner, step down to Member, or leave the account. At least one active owner must remain. Changing someone else's ownership requires a recent two-factor verification.
Remove a Member
- Open the account as an owner and open the member's actions menu.
- Select Remove from account.
- Check the person's name in the confirmation, then confirm removal.
- Confirm that they are no longer listed under Members.
Removing a member immediately removes their membership and access to this account. It does not delete their Braiins ID or remove access to other accounts. To restore access, send a new invitation.
To remove your own membership, see Leave an account. If an account or invitation is missing, see Troubleshooting.